How to Prepare Images for Printing (DPI, Format & Color Guide)
Printing a photo, poster, business card, or wedding invitation? The image that looks perfect on your screen might come out blurry, pixelated, or color-shifted on paper. Here's everything you need to know to get print-quality results every time.
Short answer: print at 300 DPI for anything held in the hand and 150 DPI for posters seen from a few feet away. Multiply the print size in inches by the DPI to get the pixels you need: an 8.5 × 11 in page is 2,550 × 3,300 pixels at 300 DPI, and an A4 page is 2,480 × 3,508. Save as high-quality JPG (or TIFF/PDF if the print shop asks), not WebP or HEIC.
Understanding DPI (Dots Per Inch)
DPI determines how many dots of ink the printer places per inch of paper. Higher DPI = sharper print.
| DPI | Quality | Best For |
|---|---|---|
| 72 DPI | Screen only | Web images, social media (NOT for print) |
| 150 DPI | Acceptable | Large posters viewed from distance (>3 feet) |
| 300 DPI | Professional | Photos, brochures, business cards, invitations |
| 600 DPI | Ultra-high | Fine art prints, text-heavy documents |
The rule: For anything people hold in their hands (photos, cards, flyers), use 300 DPI minimum. For posters and banners viewed from a distance, 150 DPI is acceptable.
For a deeper dive into resolution concepts, read our complete guide to image resolution and DPI.
How to Calculate Required Pixel Dimensions
The formula is simple: Print size (inches) × DPI = Required pixels
| Print Size | At 300 DPI | At 150 DPI | Megapixels Needed |
|---|---|---|---|
| 4×6" (Standard photo) | 1200 × 1800 | 600 × 900 | 2.2 MP |
| 5×7" (Greeting card) | 1500 × 2100 | 750 × 1050 | 3.2 MP |
| 8×10" (Portrait) | 2400 × 3000 | 1200 × 1500 | 7.2 MP |
| 11×14" (Small poster) | 3300 × 4200 | 1650 × 2100 | 13.9 MP |
| 16×20" (Large print) | 4800 × 6000 | 2400 × 3000 | 28.8 MP |
| 24×36" (Poster) | 7200 × 10800 | 3600 × 5400 | 77.8 MP |
Quick check: If your image has fewer pixels than the "At 300 DPI" column, either print smaller or accept some quality loss. Never upscale an image for print — it will look blurry.
Best File Formats for Printing
| Format | Quality | Print Suitability | When to Use |
|---|---|---|---|
| TIFF | Lossless | ⭐⭐⭐⭐⭐ | Professional print shops, fine art |
| PNG | Lossless | ⭐⭐⭐⭐ | Graphics, logos, images with transparency |
| JPG (95-100%) | Near-lossless | ⭐⭐⭐⭐ | Photo prints, posters, most printing needs |
| JPG (80-90%) | Good | ⭐⭐⭐ | Budget printing, proofs, drafts |
| WEBP | Good | ⭐ | NOT recommended — most print software doesn't support it |
| HEIC | Good | ❌ | NOT supported by print shops |
Recommendation: For most printing needs, JPG at 95% quality is the best balance of quality and file size. For professional prints, ask your print shop — many prefer TIFF or high-quality PDF.
Converting Web Images for Print
If you only have a web-resolution image (downloaded from a website, social media, or email), it may not have enough pixels for quality printing. Here's what you can do:
- Check the pixel dimensions — Right-click → Properties (Windows) or Get Info (Mac)
- Calculate the max print size — Divide pixels by 300 to get inches (e.g., 3000px ÷ 300 = 10 inches)
- Convert format if needed — Print shops usually want JPG or TIFF, not WEBP or HEIC
Use our converters to switch formats: WEBP to JPG, HEIC to JPG, or AVIF to JPG. Set quality to 95% for print.
Color Mode: RGB vs CMYK
This is one of the biggest surprises for people new to printing:
- RGB (Red, Green, Blue) — Used by screens. Your phone, camera, and monitor all use RGB.
- CMYK (Cyan, Magenta, Yellow, Key/Black) — Used by printers. Inks mix differently than light.
When you print an RGB image, some colors shift — especially bright blues, vivid greens, and neon colors. They'll appear duller in print because CMYK has a smaller color range (gamut) than RGB.
What to do: For casual printing (home printer, pharmacy kiosk), RGB is fine. For professional printing (business cards, brochures), ask your print shop if they need CMYK files. Professional design tools like Adobe Photoshop can convert color modes.
Common Print Sizes & Uses
| Size | Common Use | Pixels Needed (300 DPI) |
|---|---|---|
| 2×3.5" | Business card | 600 × 1050 (+ bleed) |
| 4×6" | Standard photo print | 1200 × 1800 |
| 5×7" | Greeting card, invitation | 1500 × 2100 |
| 8.5×11" | Letter/flyer | 2550 × 3300 |
| 8×10" | Framed photo | 2400 × 3000 |
| 11×17" | Small poster | 3300 × 5100 |
| 18×24" | Medium poster | 5400 × 7200 |
| 24×36" | Large poster | 7200 × 10800 |
Bleed, Safe Zone & Trim
If your image extends to the edge of the paper (no white border), you need bleed — extra image beyond the trim line:
- Bleed: Add 0.125" (3mm) on each side. A 4×6" print needs a 4.25×6.25" image.
- Safe zone: Keep important content (text, faces) at least 0.25" from the edges.
- Trim line: Where the paper is actually cut.
Paper Sizes in Pixels (Letter, Legal, A4, A3)
Paper size in pixels depends on the DPI you print at: inches × DPI for each side (millimetres ÷ 25.4 first for A sizes). 72 DPI is a screen-size preview only; 150 DPI is draft or poster quality; 300 DPI is the standard for sharp print.
| Paper | Size | 72 DPI | 150 DPI | 300 DPI |
|---|---|---|---|---|
| US Letter | 8.5 × 11 in | 612 × 792 | 1,275 × 1,650 | 2,550 × 3,300 |
| US Legal | 8.5 × 14 in | 612 × 1,008 | 1,275 × 2,100 | 2,550 × 4,200 |
| Tabloid / Ledger | 11 × 17 in | 792 × 1,224 | 1,650 × 2,550 | 3,300 × 5,100 |
| A5 | 148 × 210 mm | 420 × 595 | 874 × 1,240 | 1,748 × 2,480 |
| A4 | 210 × 297 mm | 595 × 842 | 1,240 × 1,754 | 2,480 × 3,508 |
| A3 | 297 × 420 mm | 842 × 1,191 | 1,754 × 2,480 | 3,508 × 4,961 |
Need a size that is not listed? The DPI print size calculator works it out both ways, and the image resizer sets exact pixel dimensions.
Poster Print DPI: How Many Pixels a Poster Needs
Posters are looked at from further away than a photo in the hand, so 150 DPI is usually enough (see the DPI table above); use 300 DPI for posters people will read up close. Your print shop's own minimum always wins, so check its file spec before you export.
| Poster size | 150 DPI | 300 DPI |
|---|---|---|
| 18 × 24 in | 2,700 × 3,600 | 5,400 × 7,200 |
| 24 × 36 in | 3,600 × 5,400 | 7,200 × 10,800 |
| 27 × 40 in (one-sheet movie poster) | 4,050 × 6,000 | 8,100 × 12,000 |
| A2 (420 × 594 mm) | 2,480 × 3,508 | 4,961 × 7,016 |
| A1 (594 × 841 mm) | 3,508 × 4,967 | 7,016 × 9,933 |
Our guide to 300 DPI vs 150 DPI shows when the lower figure is visible and when it is not.
Print-Ready Checklist (5 Steps)
- Check the pixels. Open the image in the image DPI checker or your file's Properties / Get Info and compare with the tables above.
- Set the DPI value. If the pixels are already enough, change only the DPI tag (no resampling) with change image DPI so layout software sizes it correctly.
- Add bleed if it prints to the edge. 0.125 in (3 mm) per side, as in the section above.
- Convert the format. JPG at 95% for photo prints, PNG for graphics, TIFF or PDF if the shop asks. Convert WebP to JPG or HEIC to JPG first.
- Ask about colour. Send RGB to home printers and photo kiosks; ask professional printers whether they want CMYK.
Frequently Asked Questions
What is 8.5 × 11 paper size in pixels?
2,550 × 3,300 pixels at 300 DPI, 1,275 × 1,650 at 150 DPI and 612 × 792 at 72 DPI. Multiply each side in inches by the DPI. A4 (210 × 297 mm) is 2,480 × 3,508 pixels at 300 DPI.
What DPI should a poster be printed at?
150 DPI is usually enough for a poster viewed from a few feet away, and 300 DPI for one people will read up close. A 24 × 36 in poster needs 3,600 × 5,400 pixels at 150 DPI or 7,200 × 10,800 at 300 DPI. Check your print shop's minimum before exporting.
Can I print a screenshot?
It depends on the size. A MacBook screenshot (3456×2234) can print well at 11×7" at 300 DPI. A phone screenshot (1170×2532) works for a 4×8" print. For larger prints, quality will suffer.
My print shop wants TIFF but I only have JPG — is that okay?
Yes, converting JPG to TIFF doesn't improve quality (the JPG compression already happened), but it gives the print shop the format they need. Just don't compress the JPG further before converting.
Can I print a photo from Instagram or Facebook?
Social media images are heavily compressed and low-resolution. A typical Instagram photo is 1080×1080 — only good for a 3.6×3.6" print at 300 DPI. For quality prints, always use the original photo from your camera or phone.
What's the best format for a photo kiosk?
JPG at 95% quality, at least 1800×1200 pixels for a standard 4×6" print. Kiosks don't accept WEBP, HEIC, or AVIF — convert them to JPG first.
Printing a screenshot? The screenshots guide covers saving it as a full-size JPG first.
Photos often print darker than they look on a backlit screen. If a test print comes out muddy, lift the exposure a little with the brighten image tool before exporting, and if you want a white mat around the picture, add a border to the image so the shop does not have to.
Gear we recommend for this workflow
As an Amazon Associate we earn from qualifying purchases. Affiliate disclosure.
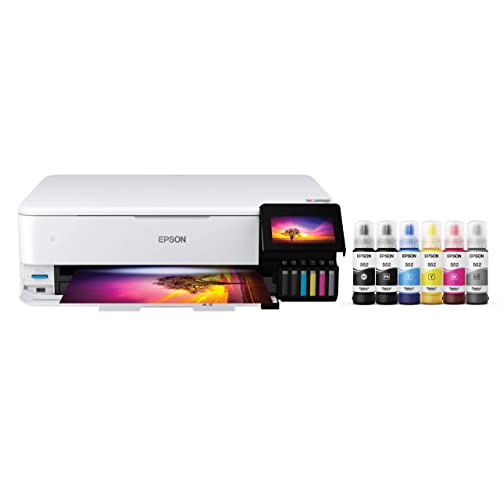
Epson EcoTank Photo ET-8550 Wireless Wide-Format All-in-One Tank Printer | Cartridge-free 6-color wide-format photo print, scan, copy; up to 16 ppm, 13 x 19 in.; ideal for creators and home studios
Best pro-grade photo printer
$592.50
Check price on Amazon
Canon PIXMA TR8620a - All-in-One Printer Home Office|Copier|Scanner|Fax|Auto Document Feeder | Photo, Document | Airprint (R), Android, Black, Works with Alexa
Best home photo printer
$210.62
Check price on Amazon
Epson Premium Photo Paper Glossy 8.5x11 50 sheets S041667 | High-gloss, heavyweight paper creates durable, smudge- and water-resistant photos for albums and frames
Best glossy paper for vivid prints
$26.00
Check price on Amazon
Canon 7981A004 Photo Paper Plus, Matte, 8-1/2 x 11 (Pack of 50 Sheets)
Best matte paper for gallery-style prints
$7.19
Check price on AmazonPrices as of Oct 14, 2026, 4:43 AM UTC. Product prices and availability are accurate as of the date/time indicated and are subject to change. Any price and availability information displayed on Amazon.com at the time of purchase will apply to the purchase of this product.
Image Optimization Tips
Get weekly tips on image formats, compression, and web performance.
No spam, unsubscribe anytime. We respect your privacy.