How to Bulk Rename and Convert Images for Photographers
You just shot a wedding with 2,000 photos. Now you need to export JPGs for the client, organize them by event segment, and rename them all from "DSC_4892.NEF" to something meaningful. Here's the efficient workflow that saves you hours.
The Photographer's Post-Processing Pipeline
Most photographers follow this workflow after a shoot:
- Import & cull — Transfer to computer, delete obvious rejects
- Edit — Lightroom, Capture One, or similar RAW processor
- Export — Convert from RAW to delivery format (usually JPG)
- Rename — Apply consistent naming for client delivery
- Deliver — Upload to gallery, USB, or download link
Steps 3 and 4 are where bulk processing saves the most time. Let's optimize them.
Choosing Your Export Format
| Delivery Purpose | Format | Quality | Resolution |
|---|---|---|---|
| Client gallery (online viewing) | JPG | 80-85% | 2048px long edge |
| Social media delivery | JPG | 85% | 1080-2048px |
| Print-ready files | JPG or TIFF | 95-100% | Full resolution |
| Client's full-res archive | JPG | 90-95% | Full resolution |
| Web portfolio | WEBP | 80% | 1920px wide |
| Album design files | TIFF or PSD | Lossless | Full resolution |
Key insight: You often need multiple export batches from the same set of images — web-size for the gallery, full-res for downloads, print-res for the album. A fast converter saves time on each pass.
Bulk Renaming Strategies
Good file naming makes organization effortless. Here are proven patterns:
For Weddings
SmithWedding_001.jpg through SmithWedding_847.jpgUse our converter's sequential rename feature: set the prefix to "SmithWedding_" and images auto-number 001, 002, 003...
For Events
Conference2026_Keynote_001.jpg Conference2026_Networking_001.jpg Conference2026_Awards_001.jpgProcess each segment separately with a different prefix.
For Portrait Sessions
JohnDoe_Headshot_001.jpg through JohnDoe_Headshot_024.jpgFor Stock Photography
sunset_beach_golden_hour_001.jpgUse descriptive keywords in the filename — many stock platforms use filenames for SEO and search.
Batch Converting with Our Tool
Here's the step-by-step for processing a large batch of photos:
- Export from Lightroom/Capture One as JPG or PNG at full resolution
- Open our converter and drag in all your exported files
- Set output format — JPG for client delivery, WEBP for your portfolio site
- Set quality — 85% for web/gallery, 95% for prints
- Optional: Set resize — 2048px width for web gallery delivery
- Set rename rule — "Sequential" with your naming prefix
- Convert all — Processing happens in your browser
- Download as ZIP — Ready for client delivery
For a general guide to batch processing, see our batch conversion guide.
Optimizing for Online Galleries
If you use online gallery services (Pixieset, ShootProof, SmugMug, Cloudspot), optimize your uploads:
- Resize to 2048px long edge — Galleries display images at this size max. Larger files just waste upload time.
- JPG at 85% — Visually identical to 100% but uploads 3x faster with hundreds of images.
- Strip metadata — Removes camera settings and GPS data from client-facing images for privacy.
- Convert to sRGB — Ensure colors look consistent across all devices (most export tools do this automatically).
Preparing Print Files
When a client orders prints or you're sending files to a print lab:
- Full resolution — Don't resize. Let the print lab handle scaling.
- JPG at 95-100% — Maximum quality with manageable file sizes.
- 300 DPI — Most RAW exports default to 300 DPI, but verify in your export settings.
- Color space: sRGB for consumer labs, Adobe RGB for professional labs (ask first).
For more details on print preparation, read our complete print preparation guide.
Time Savings Comparison
| Task | Manual (per image) | 500 Images Manual | Batch Tool |
|---|---|---|---|
| Rename files | 15 seconds | 2+ hours | 30 seconds (set prefix once) |
| Convert format | 30 seconds | 4+ hours | 3-5 minutes |
| Resize | 20 seconds | 2.5+ hours | Included in convert step |
| Compress | 20 seconds | 2.5+ hours | Included in convert step |
| Total | — | 11+ hours | ~5 minutes |
Handling Different Camera Formats
Different cameras produce different file types. Here's how to handle them:
- RAW (NEF, CR3, ARW, RAF) — Process in Lightroom/Capture One first, then export as JPG for batch conversion
- HEIC (iPhone secondary camera) — Convert to JPG for universal compatibility
- TIFF (from scanning) — Convert to JPG to reduce file size 90%+
- PNG (from editing software) — Convert to JPG for smaller deliverables
Frequently Asked Questions
Should I deliver RAW files to clients?
Generally no. RAW files require special software to open and look flat/unedited without processing. Deliver edited JPGs. If a client specifically requests RAW, charge accordingly — they're paying for your unfinished work and editing flexibility.
What naming convention is most professional?
"ClientName_EventType_001.jpg" is the industry standard. It's sortable, searchable, and immediately identifies the content. Avoid spaces in filenames — use underscores or hyphens.
How do I organize photos from two photographers at the same event?
Use prefixes: "EventName_PhotogA_001.jpg" and "EventName_PhotogB_001.jpg". Or if merging into one timeline, batch rename all files with a single sequential prefix after culling.
What resolution should I export for Instagram?
1080px wide for feed posts, 1080×1920 for Stories/Reels. JPG at 85% quality. For our complete social media size reference, see the social media image sizes guide.
Gear we recommend for this workflow
As an Amazon Associate we earn from qualifying purchases. Affiliate disclosure.

Canon EOS Rebel T7 DSLR Camera with 18-55mm Lens Bundle | For Beginner Photography | 24.1MP APS-C DSLR Camera | Built-in Wi-Fi & NFC + 64GB Memory Card + Camera Bag
Best DSLR for learning photography
$529.00
Check price on Amazon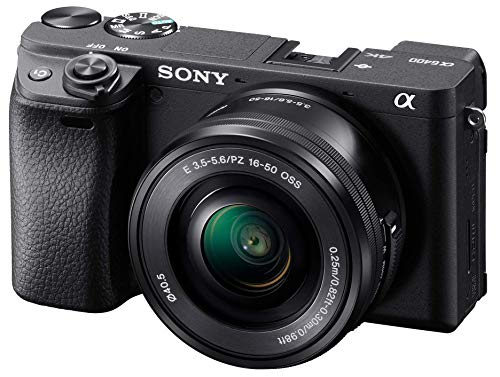
Sony Alpha a6400 Mirrorless Camera: Compact APS-C Interchangeable Lens Digital Camera with Real-Time Eye Auto Focus, 4K Video, Flip Screen & 16-50mm Lens - E Mount Compatible - ILCE-6400L/B, Black
Best mirrorless camera for creators
$811.48
Check price on Amazon
Nikon Z50 II with Two Lenses | Compact mirrorless Stills/Video Camera with Easy Color presets and Wireless Photo Sharing | USA Model
Best entry-level Nikon mirrorless
$1,396.95
Check price on Amazon
FUJIFILM X-T30 III Mirrorless Camera Body, with XC13-33mm Lens Kit, Charcoal Silver
Best for photographers who love film-style color
$1,165.01
Check price on AmazonPrices as of Oct 15, 2026, 4:40 AM UTC. Product prices and availability are accurate as of the date/time indicated and are subject to change. Any price and availability information displayed on Amazon.com at the time of purchase will apply to the purchase of this product.
Image Optimization Tips
Get weekly tips on image formats, compression, and web performance.
No spam, unsubscribe anytime. We respect your privacy.