Understanding Image Resolution and DPI
Resolution and DPI are among the most misunderstood concepts in digital imaging. Designers argue about them, clients request "high-res" without knowing what it means, and photographers confuse DPI with pixel count. Whether you're preparing images for a website, social media, or print, understanding these terms is essential for professional, efficient results.
The Three Key Concepts
1. Image Resolution (Pixel Dimensions)
Image resolution refers to the total number of pixels in an image, expressed as width × height. For example, a "12 megapixel" image from a phone camera is 4032 × 3024 pixels — roughly 12.2 million pixels total.
Resolution determines:
- How much detail the image contains
- How large it can be displayed or printed before quality degrades
- The base file size (more pixels = more data)
2. DPI (Dots Per Inch)
DPI is a printing term that describes how many ink dots a printer places in one linear inch of paper. A 300 DPI printer creates 300 dots per inch, resulting in 90,000 dots per square inch (300 × 300).
Critical insight: DPI is a print setting, not an inherent property of a digital image. Changing an image's DPI metadata from 72 to 300 doesn't change the image itself — it only changes how large it prints.
3. PPI (Pixels Per Inch)
PPI describes the density of pixels on a screen display. A standard desktop monitor is typically 96 PPI, while a MacBook Pro Retina display is 226 PPI, and an iPhone 15 Pro is 460 PPI.
Higher PPI means sharper display, but the image file itself doesn't change — the same 1920×1080 image looks sharp on a 96 PPI monitor and tiny on a 460 PPI phone.
The DPI Myth: Why It Doesn't Matter for Web
Here's the most important thing to understand: DPI is completely irrelevant for web images.
When a browser displays an image, it uses the image's pixel dimensions, not its DPI metadata. An 800×600 image set to 72 DPI and an 800×600 image set to 300 DPI display identically on screen — same size, same quality, same file size.
The only thing that matters for web images is the number of pixels (resolution). Don't waste time adjusting DPI for images intended for screens.
DPI for Print: What You Actually Need
| Use Case | Recommended DPI | Why |
|---|---|---|
| Standard photo prints | 300 DPI | Industry standard; sharp at normal viewing distance |
| Magazine/book printing | 300 DPI | Professional quality requirement |
| Large format posters | 150 DPI | Viewed from 2-3 feet; 300 DPI unnecessary |
| Billboards | 30-72 DPI | Viewed from 20+ feet; low DPI is invisible at distance |
| Fine art / gallery prints | 360-600 DPI | Close viewing, maximum detail |
| Screen printing (t-shirts) | 150-200 DPI | Fabric doesn't hold ultra-fine detail |
Calculating Print Size from Pixels
The formula is simple: Print size (inches) = Pixels ÷ DPI
Example: A 4000 × 3000 pixel image at 300 DPI prints at 13.3 × 10 inches. The same image at 150 DPI prints at 26.7 × 20 inches — larger, but less detailed per inch.
| Image Pixels | At 300 DPI | At 150 DPI | At 72 DPI |
|---|---|---|---|
| 4000 × 3000 | 13.3" × 10" | 26.7" × 20" | 55.6" × 41.7" |
| 3000 × 2000 | 10" × 6.7" | 20" × 13.3" | 41.7" × 27.8" |
| 1920 × 1080 | 6.4" × 3.6" | 12.8" × 7.2" | 26.7" × 15" |
| 1200 × 800 | 4" × 2.7" | 8" × 5.3" | 16.7" × 11.1" |
Resolution Requirements for Web
For web images, focus on pixel dimensions. Here are the recommended sizes for common use cases:
Website Images
| Element | Standard Display | Retina (2×) | Notes |
|---|---|---|---|
| Hero / banner | 1920 × 1080 | 3840 × 2160 | Full-width images |
| Blog content image | 800 × 600 | 1600 × 1200 | Within article body |
| Thumbnail | 300 × 300 | 600 × 600 | Product grids, gallery |
| Logo | 200 × 50 | 400 × 100 | Use SVG if possible |
| Favicon | 32 × 32 | 64 × 64 | Also provide 16×16, 192×192 |
| Open Graph image | 1200 × 630 | N/A | Social media preview |
Social Media Images
| Platform | Post Image | Profile Photo | Cover Photo |
|---|---|---|---|
| 1080 × 1080 | 320 × 320 | N/A | |
| 1200 × 630 | 170 × 170 | 820 × 312 | |
| Twitter/X | 1200 × 675 | 400 × 400 | 1500 × 500 |
| 1200 × 627 | 400 × 400 | 1584 × 396 |
Retina and High-DPI Displays
Modern devices use high-DPI (HiDPI) or "Retina" displays with pixel densities of 2× or 3× standard screens. This means:
- A 2× display packs 4 physical pixels into each CSS pixel (2 × 2)
- A 3× display packs 9 physical pixels into each CSS pixel (3 × 3)
To look sharp on these screens, serve images at 2× the CSS display size. An image displayed at 400 × 300 CSS pixels should be 800 × 600 actual pixels.
Serving 3× images is rarely necessary — the visual difference between 2× and 3× is minimal, but file sizes triple. The exception is text-heavy images like infographics where readability matters.
How Resolution Affects File Size
The relationship between resolution and file size is roughly quadratic: doubling both dimensions quadruples the number of pixels, which approximately quadruples the file size.
| Resolution | Pixels | JPG (85%) Size | PNG Size |
|---|---|---|---|
| 500 × 375 | 187K | ~50 KB | ~300 KB |
| 1000 × 750 | 750K | ~200 KB | ~1.2 MB |
| 2000 × 1500 | 3M | ~800 KB | ~5 MB |
| 4000 × 3000 | 12M | ~3 MB | ~20 MB |
This is why resizing images to actual display dimensions is one of the most effective optimization techniques. Serving a 4000×3000 image in a 500×375 container wastes 98.4% of the data downloaded.
Upscaling vs Downscaling
Downscaling (Reducing Resolution)
Reducing resolution is safe and beneficial. The resizing algorithm combines multiple pixels into one, resulting in a sharp, smaller image. Always start with the highest-resolution source and downscale.
Upscaling (Increasing Resolution)
Increasing resolution beyond the original pixel count creates blurry, soft images. The software has to "invent" pixel data that doesn't exist. Traditional algorithms (bilinear, bicubic) produce noticeably soft results. AI upscalers have improved dramatically but still can't match native resolution.
Rule: Never upscale for quality. If you need a larger image, start from a higher-resolution source.
Optimize Your Images
Use our free image converter to resize images to the perfect dimensions for your use case. You can set maximum width/height during conversion to automatically downscale oversized images while maintaining aspect ratio. Combine with proper compression for the smallest possible files.
Going deeper: DPI vs PPI explained untangles the two acronyms, and 300 DPI vs 150 DPI shows exactly how many pixels each print size needs. To see the DPI your file already has, use the image DPI checker; to set the tag itself, use the change image DPI tool. To turn a pixel count into inches, centimetres or millimetres at any PPI — or find 8.5 × 11 and A4 in pixels — use the pixels to inches converter.
Frequently Asked Questions
Is resolution the same as DPI?
No. Resolution is the pixel count, such as 3000 × 2000. DPI is a separate number stored in the file telling a printer how many of those pixels to place in each inch. Changing DPI changes the printed size, not the image.
What is DPI in an image?
Dots per inch: a printing instruction saved in the file header (JFIF or EXIF in a JPEG, pHYs in a PNG). Screens ignore it completely. It only matters when the image is printed or placed in a layout program.
What is 300 DPI in pixels?
300 pixels per printed inch. A 4 × 6 print needs 1200 × 1800 pixels, 8 × 10 needs 2400 × 3000, and A4 needs 2480 × 3508.
How do I check the DPI of an image?
Use an image DPI checker, which reads the stored value and shows how large the picture prints sharply at 300 DPI. On Windows, right-click > Properties > Details also shows it; on a Mac, Preview > Tools > Show Inspector.
What DPI should web images be?
It does not matter. Browsers display images by pixel dimensions and ignore the DPI tag. Size web images in pixels — for example 1600 px wide for a full-width photo.
How does viewing distance change the DPI you need?
The further away a print is seen, the fewer dots per inch the eye can resolve. A rough rule: 300 DPI for prints held in the hand (about 30 cm), 150 DPI for posters seen from 1–2 m, and 30–50 DPI for banners and billboards viewed from several metres. A 24 × 36 inch poster at 150 DPI needs 3600 × 5400 pixels, not the 7200 × 10800 that 300 DPI would ask for.
Gear we recommend for this workflow
As an Amazon Associate we earn from qualifying purchases. Affiliate disclosure.
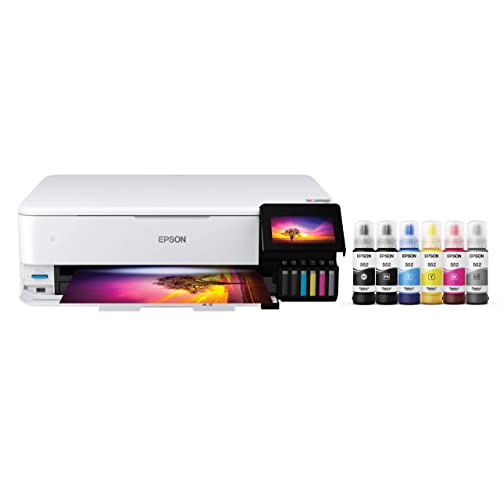
Epson EcoTank Photo ET-8550 Wireless Wide-Format All-in-One Tank Printer
Best pro-grade photo printer
$593.50
Check price on Amazon
Canon PIXMA TR8620a - All-in-One Printer Home Office|Copier|Scanner|Fax|Auto Document Feeder | Photo, Document | Airprint (R), Android, Black, Works with Alexa
Best home photo printer
$149.00
Check price on Amazon
Epson Premium Photo Paper Glossy 8.5x11 50 sheets S041667
Best glossy paper for vivid prints
$26.00
Check price on Amazon
Liene M100 4x6'' Photo Printer, Phone Printer 100 Sheets & 3 Cartridges, Full-Color Photo, Portable Instant Photo Printer for iPhone Android, Thermal Dye Sublimation, Wi-Fi Picture Printer 100 Papers
Best studio-grade photo printer
$159.99
Check price on AmazonPrices as of Oct 11, 2026, 4:44 AM UTC. Product prices and availability are accurate as of the date/time indicated and are subject to change. Any price and availability information displayed on Amazon.com at the time of purchase will apply to the purchase of this product.
Image Optimization Tips
Get weekly tips on image formats, compression, and web performance.
No spam, unsubscribe anytime. We respect your privacy.